Tutorial: How to Create a Pull Through Braid in 2 Ways
Easier than it looks!

Time
Hair Types
You Will Need


Have you heard of the pull through braid? Just in case you’re tired of the traditional braid by now, we’ve spotted a cute new version that’s so ’grammable, we couldn’t keep it to ourselves. Ladies, save this space: The pull through braid is a totally adorable, clever, and deceptively easy braided look that’s kind of not even a braid per se. Translation: If you’re all thumbs in the plait department but still want a fancy way to spiff up your pony, this no-braid braid is just the thing for you.
Ready to rock this look? Read on to check out how to pull through braid in two fun ways.
Style 1: How To Do a Pull-Through Braid, Step by Step
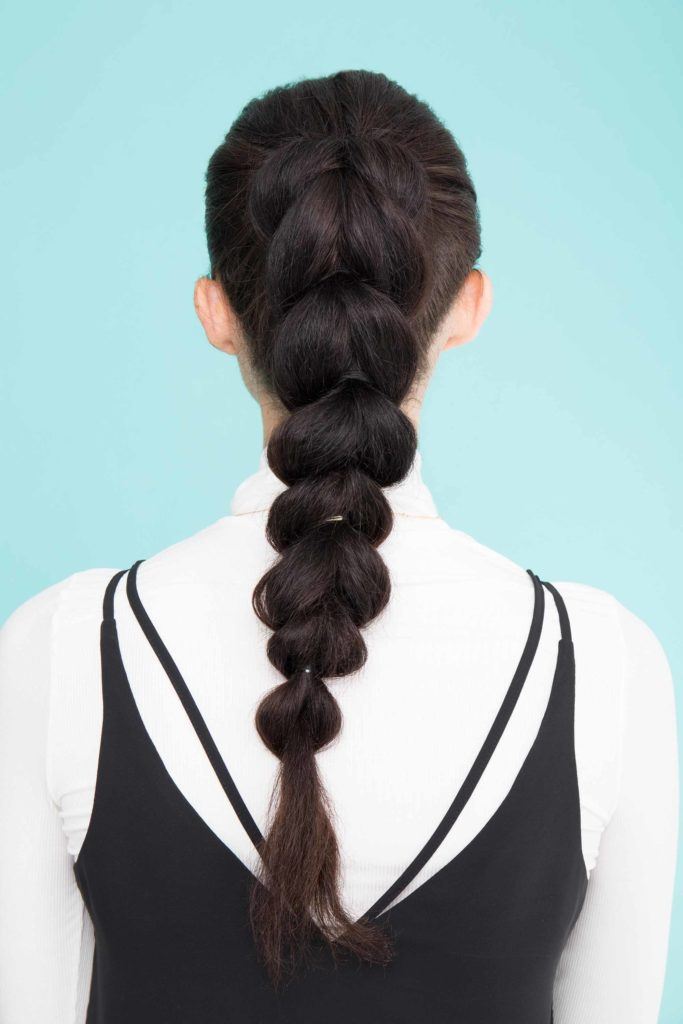
Essentially just two ponytails lying on top of each other, the magic happens when the bottom ponytail is pulled through the top pony, creating a woven effect when continued till the ends. Takes some practice—we’ve found working sideways or with a back, a mirror helps the first few tries—but once you’ve mastered the pull through braid, you’ll never look at plaiting hair the same way again.
To inspire you to get in on the French pull through braid, we are sharing two ways to style this look. The first way is a traditional pony and the second is a side pull through braid that features a part bohemian and part festival flower child look (with a bit of ’80s prepster thrown in). The side pull-through braid also has the wow power of a Dutch braid and the swag of a high ponytail combined.
Start with clean, freshly washed hair.
Prep your hair in the shower by washing your strands and then towel-dry your hair.

Apply a blow-dry lotion.
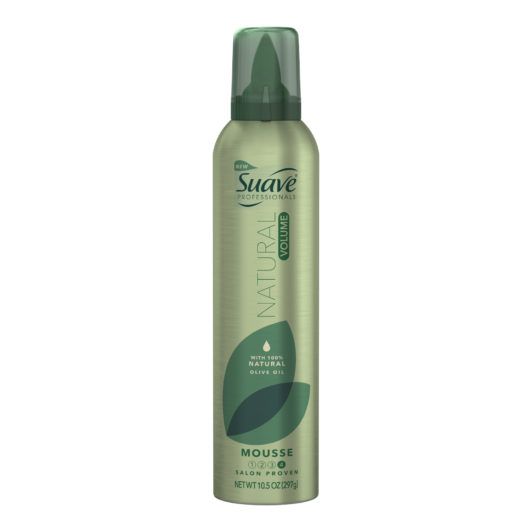
A volumizing spray or lotion helps infuse hair with lift and texture, elements crucial to a fat, juicy pancaked weave. On rough-dried hair, spritz an even coating of a blow-dry lotion, or a mousse like Suave Professionals Natural Volume Mousse from root to tip.

Apply some serum.
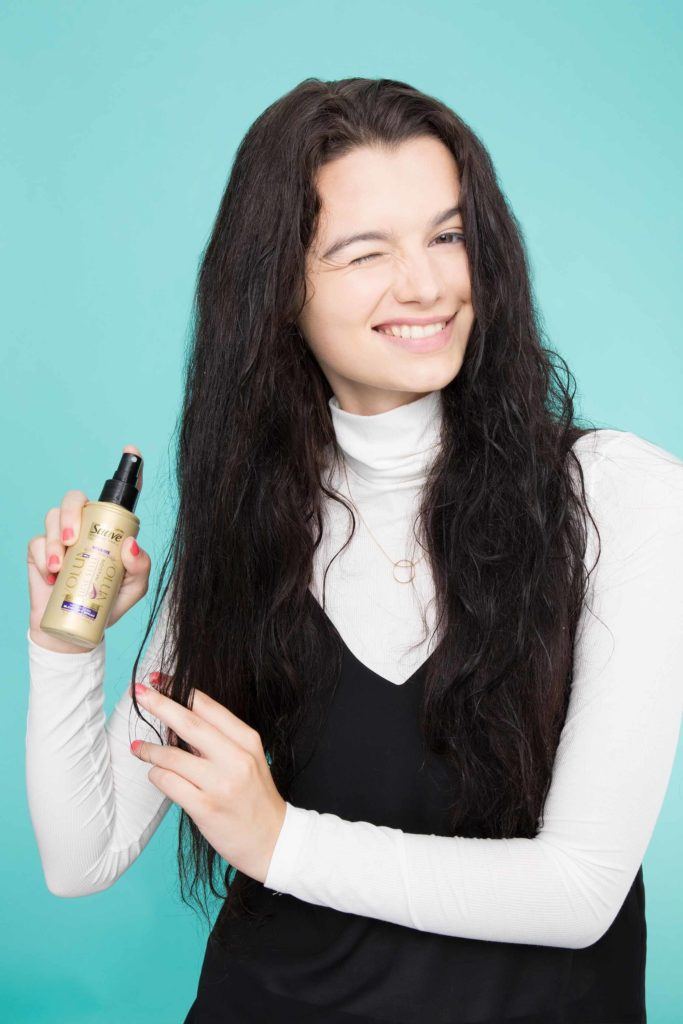
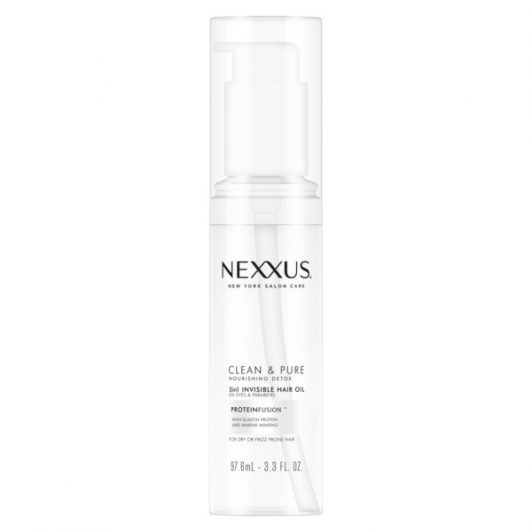
Now that your hair is properly fluffed up, it’s time to give some shine and softness onto your mid-lengths via a serum. We like the non-sticky nourishment we get from Nexxus Clean & Pure Nourishing Detox 5-in-1 Invisible Hair Oil, which also helps manage any frizzies.

Tie hair into a pony.
Gather and tie hair into a medium-height ponytail at the back of your head. Secure with a hair-colored or clear elastic.

Split ponytail into two.
Using either your fingers or a fine-toothed comb, divide your ponytail into two sections: the top half and bottom half.

Segment the top half.
Set the bottom half aside for now. Using a hair-colored or clear elastic, segment the top ponytail by tying an elastic a few inches below your first hair tie.


Pull the bottom pony through.
Using your finger or the sharp end of a rat-tail comb, poke a hole into the top pony. Carefully pull the bottom pony through the hole.

Tie it off.
Secure the bottom pony (which is now on top) with a hair elastic right below that first chain.

Repeat the process.
Continue poking a hole in the top ponytail and pulling the bottom ponytail through, and securing with a hair tie after each loop.


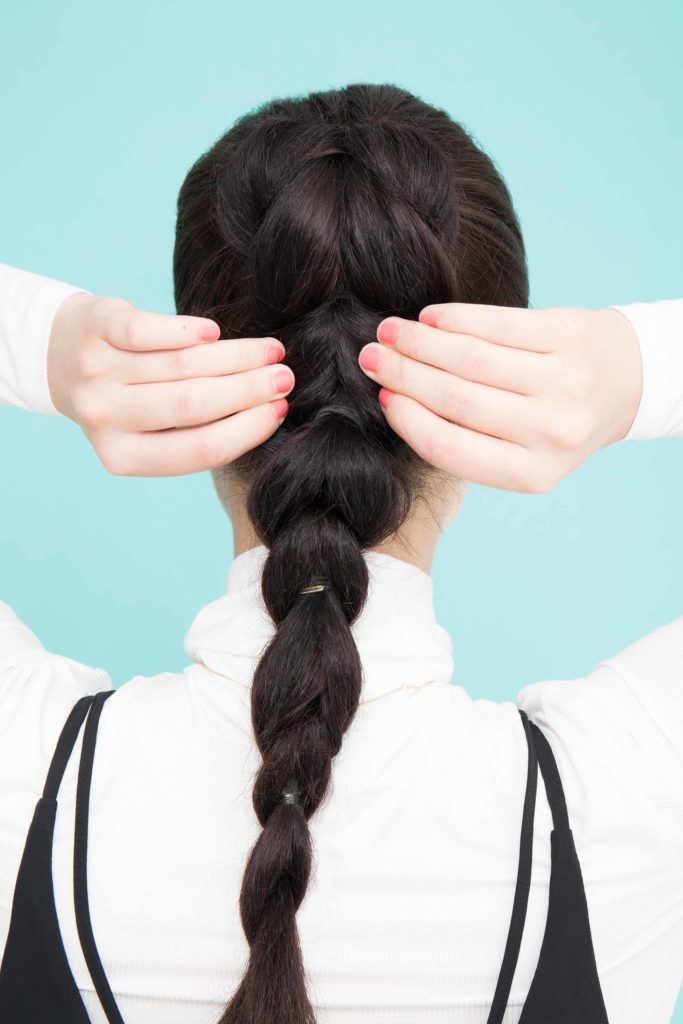
Pancake your ponytails.
Gently and carefully tug the sides of each link, which helps even out the look of your pull through braid.
Finish with hairspray.
Finally, protect your ponytail against flyaways and frizz with hairspray that guards against humidity. You’re all set!
Style 2: Side Pull Through Braid Tutorial

Step 1: Start on clean, freshly washed hair.
A side pull-through braid, like most built-in braids, may put your roots on display, so it’s best to start with clean, non-greasy hair.
Step 2: Apply a thermal protectant, then blow-dry.
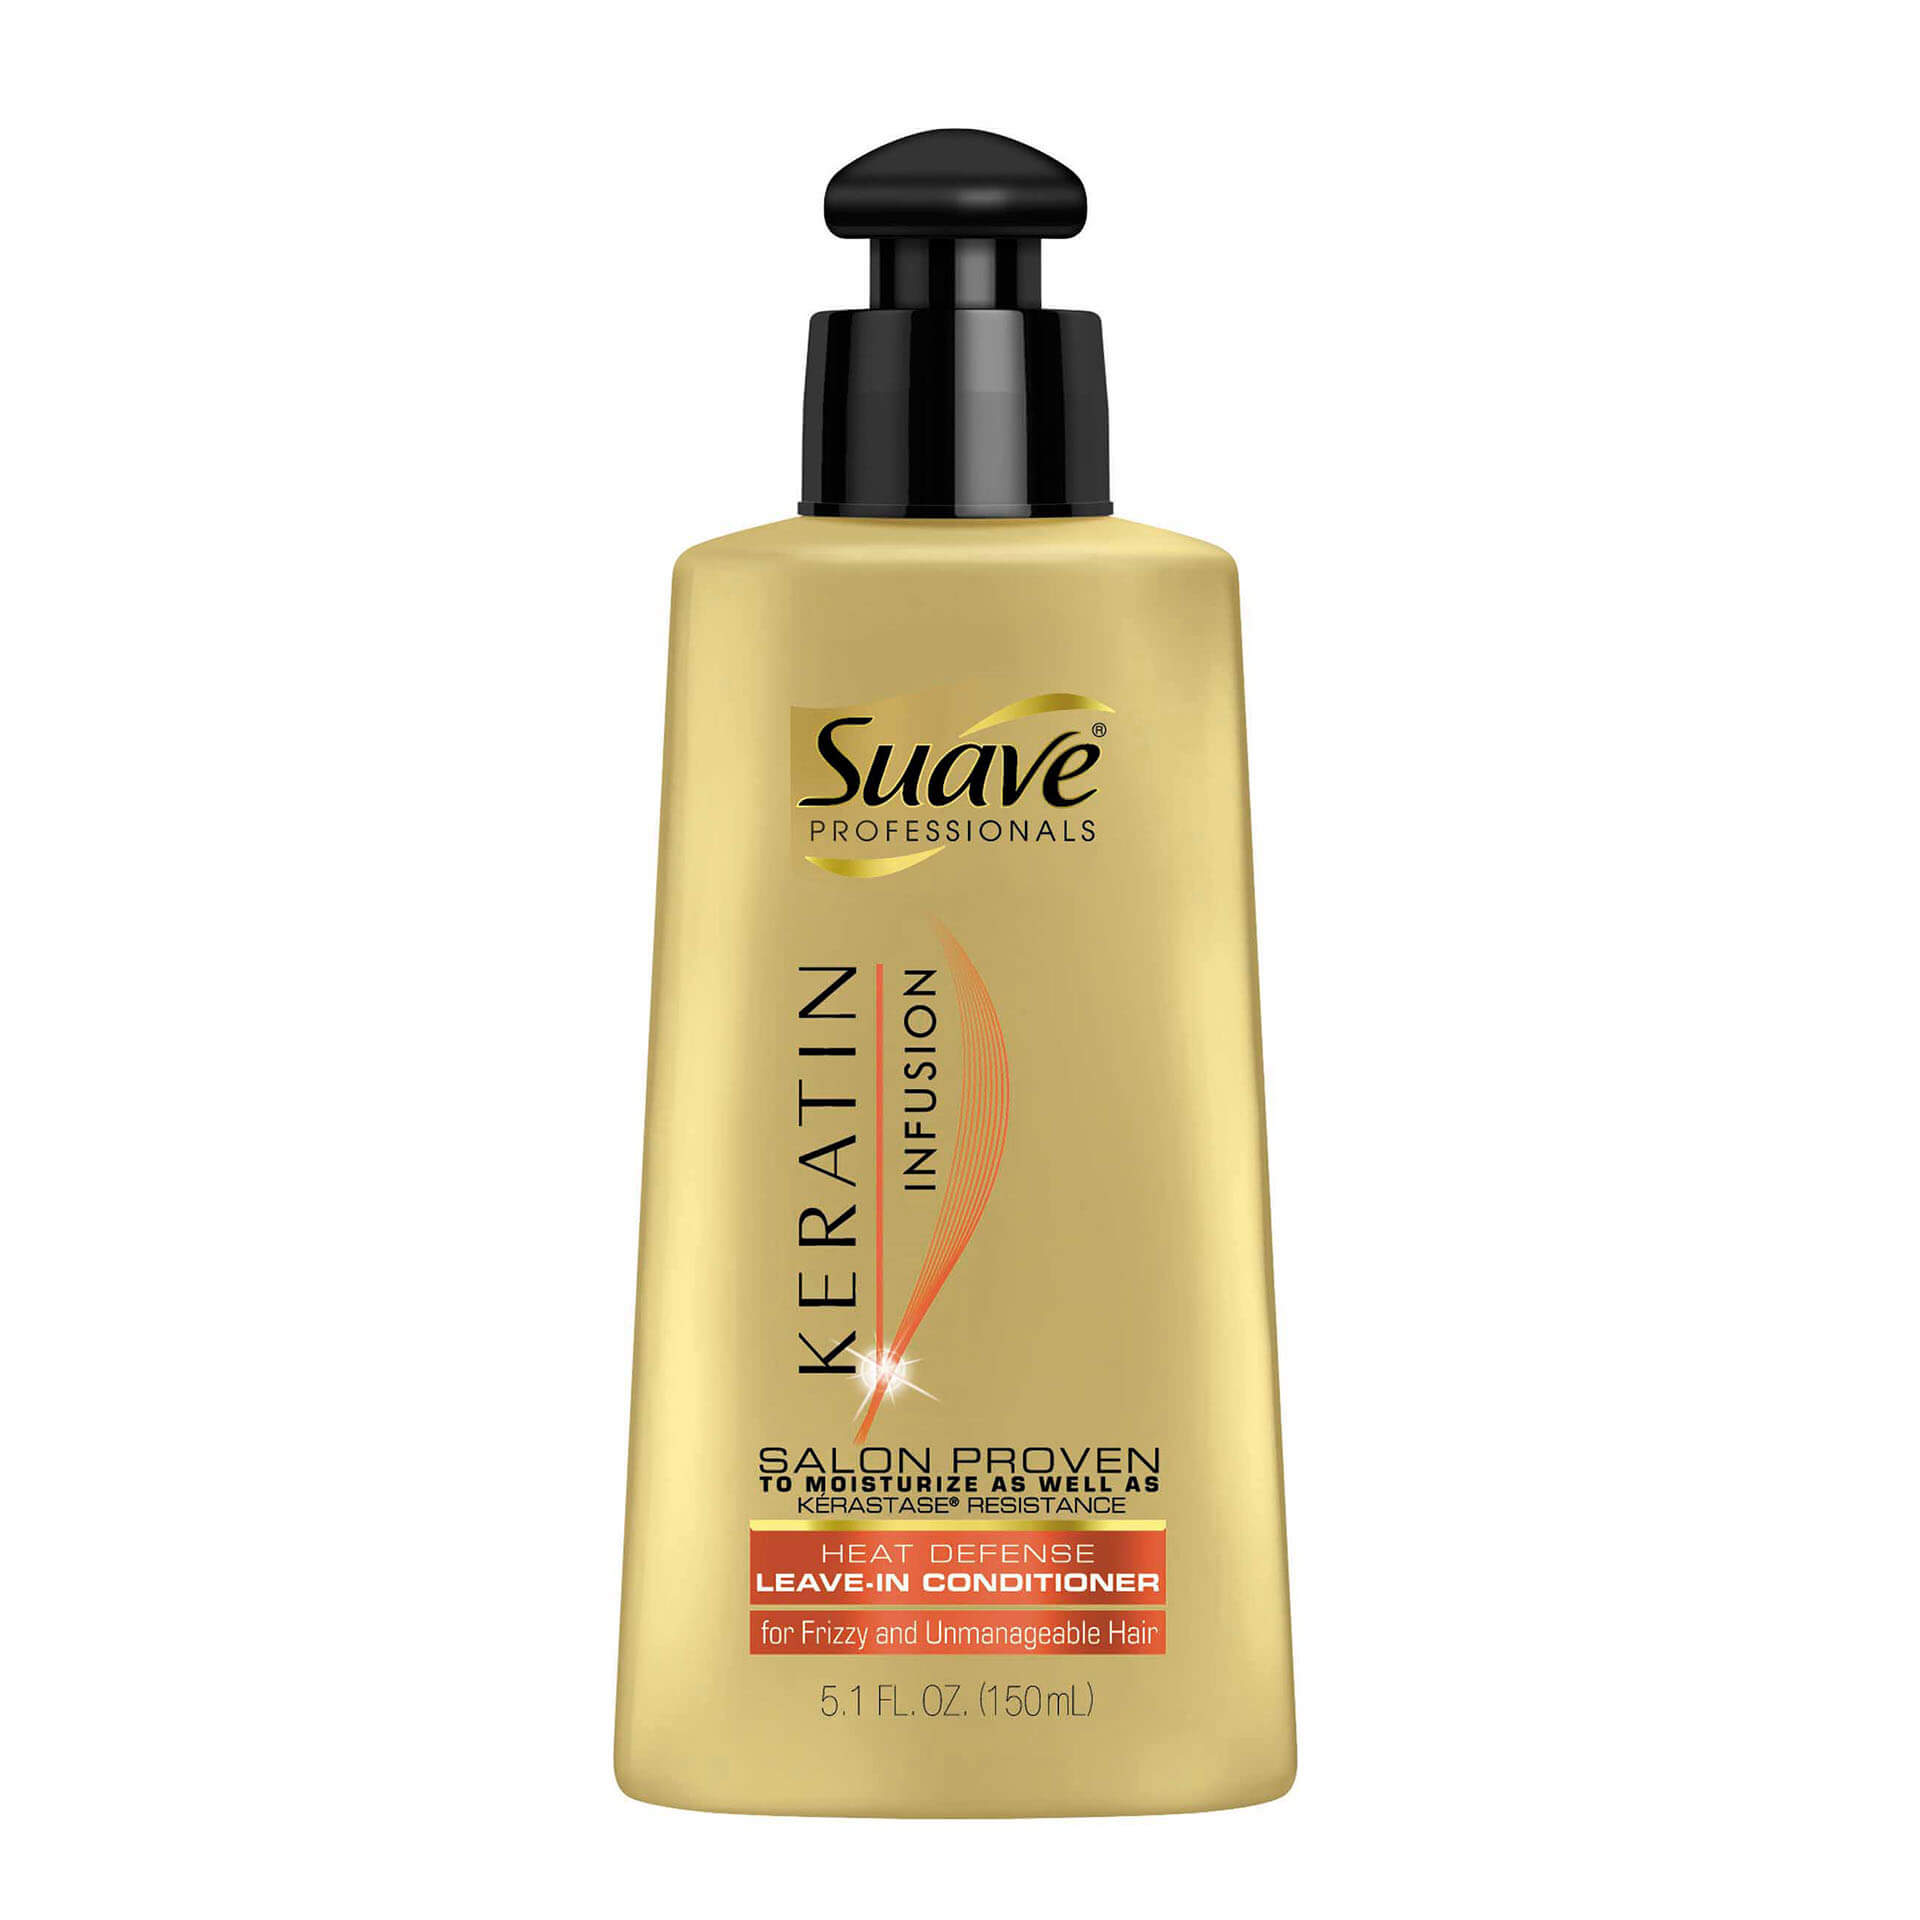
Prep hair with a heat protectant—we like Suave Professionals Keratin Infusion Heat Defense Leave-In Conditioner—to protect hair from hot tool styling. Follow up with a blowdryer and a paddle brush, working until hair is completely dry.
Step 3: Create a high-side ponytail.
Working on hair that’s been thoroughly brushed and detangled, pinch off the leftmost section you can manage and create a small, high side ponytail directly above your left ear. Tie off with a clear or neutral-colored elastic.
Step 4: Split your first ponytail.
Flip your first ponytail over and clip it so it’s out of the way (for now). Then take small strips of hair under each side of that first section, gather those into a ponytail directly underneath, and tie them off with an elastic. Unclip your first ponytail and split it into two parts.
Step 5: Clip your second ponytail up.
Clip your second ponytail on top and out of the way (in between your split-up first ponytail).
Step 6: Make a third ponytail by incorporating your first pony with new hair from each side.
Take hair from each side of your head for your third segment, and, together with the hair from your first pony, gather it all into a new ponytail. Split that new ponytail into two, unclip your second pony and have it fall in between.
Step 7: Continue the pattern until you reach your other ear.
Continue your side pull-through braid, incorporating new hair each time so it has a built-in effect, like a Dutch or French braid. Stop when you reach the opposite ear.
Step 8: Work with your existing ponytails.
When you run out of hair from your head, repeat the pattern with your existing ponytails. Simply split the previous ponytail in half, bring both strips under and around the lower pony, and tie it off with an elastic. Continue until the ends.
Step 9: Pull the chains apart.
For the final touch, pull each chain apart, or pancake it, to make it fatter and fuller-looking. Don’t stress about this—the more textured, the better!
Step 10: Finish with hairspray.
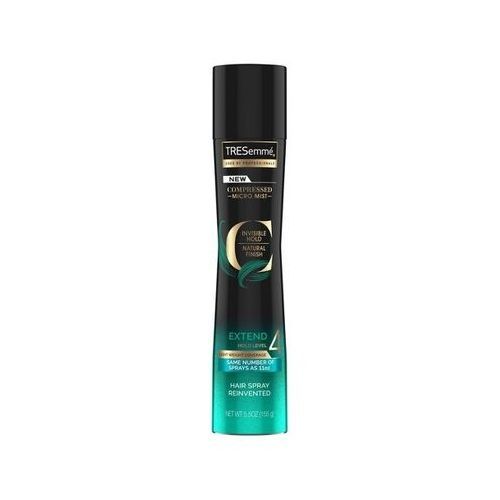
Tame any flyaways and frizz with a hairspray, like TRESemmé Compressed Micro Mist Extend Hold Level 4 Hair Spray. You’re done!
Are you thinking about trying out this style? Be sure to take a picture and tag us @AllThingsHairUS!
