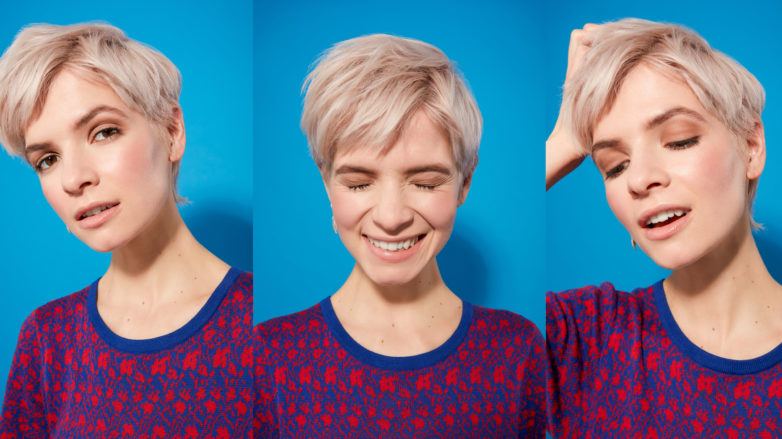
How to Blow-Dry a Pixie Cut: Easy Tutorial for Beginners
It's a piece of cake!
Time
Skill
You Will Need


Have you ever wondered how to blow-dry a pixie cut without the help of a professional? It’s time you know-how. If you’re considering this cut, or already have one, you don’t have to depend on your stylist to get your hair in shape (unless it involves a pair of scissors). Pixie cuts are one of those styles that don’t require much maintenance as long as you have a good blow-drying technique.
Read on to learn how to blow-dry a pixie cut with our easy tutorial:
How to Blow-Dry a Pixie Cut
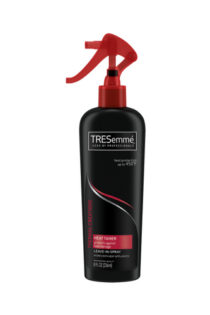
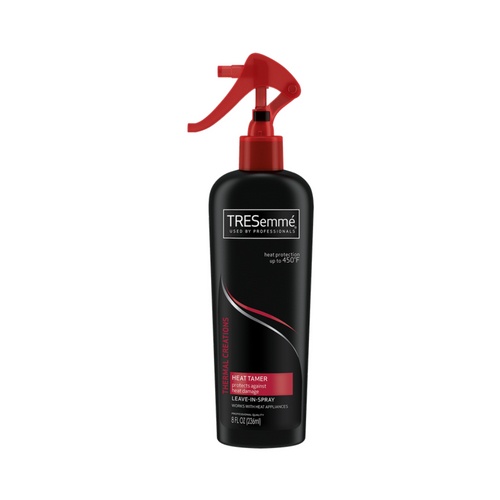
Prep with heat protectant.
Begin with freshly washed hair and spray a heat protectant like TRESemmé Thermal Creations Heat Tamer Spray to guard your hair.

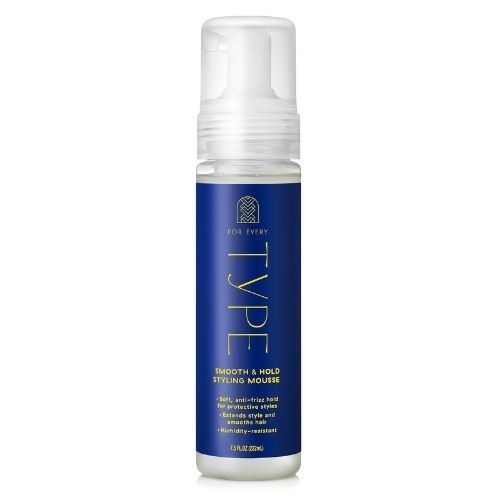
Apply mousse.
Apply For Every Hair Type Smooth & Style Mousse throughout the roots. This will help you achieve a voluminous blowout.

Section hair.
To make blow-drying your pixie cut easier, begin to section your hair. Use hair pins or hair clips to section into four parts.

Blow-dry hair.
Now it’s time to blow-dry your hair. Make sure that the nozzle of your blow-dryer is pointing in the same direction as the handle. Move-in quick motions to avoid applying too much heat to just one section of your hair.

Finish up blow-drying.
Blow dry the back, crown and front of your hair lifting hair at the root for volume as you go.


Blow-drying your pixie cut doesn’t have to be hard. With just a few easy steps, even beginners will be able to nail this look.

