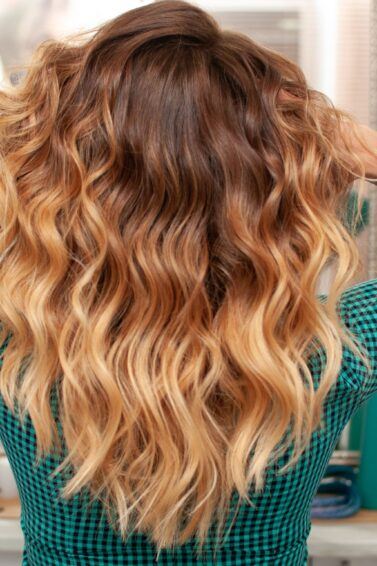
Ombre Hair Color 101: What it is and How to Get it at Home
Lighten up your locks.
It was only a couple of years ago when ombre hair color surfaced, and it doesn’t look like it is going anywhere soon. And that’s a good thing. The trend has been in and out of style, but it is back right now. If you don’t know what ombre is, we’re here to help you out, and we’re sure you’ll want in on it, too. Read on to learn about the low-maintenance hair color trend and how to score the look at home with these five easy steps.
Ombre Hair Color Basics
What is ombre hair color, and how did it start?
Ombre hair is simply hair that gradually gets lighter starting from the mid-shaft directly to the ends, and the roots of the hair are normally left untouched. The name itself is borrowed from the French term ‘ombré,’ which by definition means having tones of color that shade into each other, graduating from light to dark. Get it? The trend started to peak around 2009, and it now includes experimentation with an array of hot and funky colors like pink, purple, and blue or a mish-mash of all. Rainbow hair colors for all! Either way, we totally love it.
How is ombre hair achieved?
Simply put, the hair is highlighted by hand using a technique called balayage. This technique is much more advanced than the D.I.Y. foil at the ends trick many of us have tried. During the balayage process, color is applied at your or your colorists’ discretion. For now, let’s stick to the basics.

How to Get Ombre Hair at Home
Step 1: Get the right supplies
Here’s what you’ll need:
- Gloves
- Applicator Brush
- Towels
- Hair ties
- Foil (optional)
- Hair Bleach
Step 2: Mix bleach and prep hair
After putting on protective gloves, begin mixing your bleach. On dirty hair that has been untangled with a detangling brush, separate hair into four or more ponytails on each side of your head, depending on the thickness of your hair. Tightly secure with a ponytail, then slide the holder down to where you want the color to begin.
Step 3: Apply the bleach
Using your brush applicator, apply bleach from the ends of the hair up to the ponytail holder. You want to begin at the ends since it will get lighter first, resulting in that beautiful gradation of highlights. Mom taught you to color in the lines; we’re telling you not to. You want this to look as natural as possible and not end up with a straight demarcation line that screams low-budget dye job. Allow the bleach to sit for 10-30 minutes, checking it every five minutes to determine if it’s the desired shade. You can add foil to the ends if you like, as the heat produced will help speed up the process.
Step 4: Wash it all out
Rinse your hair thoroughly until the water runs clear. This is a crucial step to follow since the hair will continue to lighten if bleach is still present on your strands. After washing your hair with the shampoo provided by your at-home kit, you may follow this step with your normal shampoo routine. We like Nexxus Therappe and Humectress Rebalancing Shampoo as it nourishes the hair.
Step 5: Condition, condition, condition!
This one is critical since bleach can dry out hair. You would think you’re running your fingers through the sand along the Sahara Desert. Add the moisture back into your hair with a hair mask like Nexxus Humectress Restoring Masque. Your tresses and color will thank you later after rinsing out the conditioner; style as usual.
Bonus: If you’re looking to add a darker color to the hair, after the rinsing process, dry the hair completely, then repeat step two. Apply a dye of your choice; we suggest a semi or demi formula since a permanent dye may be too harsh on your freshly bleached hair. Proceed to the wash and condition process, style your hair, and you’re golden!
Have you tried out the ombré hair process?

